Integrating Journey Maps into UX Design
A comprehensive guide!
As UX pros, we strive to create experiences that resonate with users. But to create experiences that truly resonate, we need to step into the user's shoes. Here's where journey maps become our secret weapon. They provide a visual roadmap, depicting a user's entire experience with your product or service. But how do we leverage this tool effectively? Let's dive deep and explore how to seamlessly integrate journey maps into your UX design process.
What is a User Journey Map?
A user journey map is a visual representation of a user's experience as they interact with a product or service to achieve a specific goal. It typically includes the following elements:
User Persona: A representation of your target user, including their demographics, goals, and pain points.
Stages: The different phases the user goes through in their journey, such as "Awareness," "Consideration," "Decision," and "Action."
Touchpoints: All the points of interaction the user has with your product or service, including websites, apps, social media, customer service, etc.
Actions: What the user does at each touchpoint (browsing, searching, purchasing, etc.)
Thoughts & Emotions: What the user is thinking and feeling at each stage of the journey.
Pain Points: The challenges and frustrations the user encounters.
Here's a simple diagram of a user journey map structure:
Benefits of User Journey Maps
There are many reasons to integrate user journey maps into your UX design process. Here are some key benefits:
Empathy: By stepping into the user's shoes and understanding their thoughts, emotions, and pain points, you can design solutions that are more user-friendly and address their real needs.
Identify Opportunities: Journey maps help you identify areas where the user experience can be improved. For example, you might discover that users are struggling to find the information they need on your website or that the checkout process is too complicated.
Align Stakeholders: Journey maps provide a shared understanding of the user experience among different stakeholders, such as designers, developers, and product managers. This can lead to more focused discussions and decision-making.
Prioritize Features: By understanding the user's needs at each stage of the journey, you can prioritize features and functionalities that will have the biggest impact on the user experience.
How to Integrate Journey Maps into UX Design
Here's a step-by-step guide on how to integrate user journey maps into your UX design process:
Define the Scope:
What product or service are you focusing on?
What specific user goals are you interested in?
Develop User Personas:
Create detailed profiles of your target users, including their demographics, behaviors, and motivations.
Gather User Research:
Conduct user interviews, surveys, usability testing, and analyze user data to understand their experiences.
Map the User Journey:
Define the different stages of the user's journey and identify the touchpoints at each stage.
Identify Pain Points & Opportunities:
Look for areas where the user is struggling or frustrated.
Identify opportunities to improve the user experience.
Prioritize & Action:
Based on the insights from your journey map, prioritize which areas to improve and brainstorm solutions.
Refine & Iterate:
As you design and develop your product or service, use the journey map to guide your decisions and iterate on your design.
Example:
Let's consider a user journey map for an e-commerce website selling shoes. The user persona is Sarah, a 30-year-old professional who is looking for a new pair of running shoes.
Through user research, we discover that Sarah becomes aware of the website through a social media Here's how Sarah's journey with the shoe e-commerce website might unfold:
Stage: Awareness
Touchpoint: Social media ad featuring a stylish runner wearing the brand's shoes.
Actions: Sarah sees the ad, clicks through to the website.
Thoughts & Emotions: "Those shoes look great! Maybe they'd help me improve my running time."
Stage: Consideration
Touchpoint: E-commerce website homepage.
Actions: Sarah browses the selection of running shoes, filters by brand and price.
Thoughts & Emotions: "Wow, there are so many options! I need to find a good balance between price and features."
Pain Point: Information overload, difficulty comparing features.
Stage: Decision
Touchpoint: Individual product page with detailed descriptions, reviews, and size charts.
Actions: Sarah reads reviews, compares features of different shoes, checks the size chart.
Thoughts & Emotions: "These reviews are helpful. I think these shoes might be the perfect fit!"
Pain Point: Unclear sizing information, lack of visual comparison tool.
Stage: Action
Touchpoint: Shopping cart and checkout process.
Actions: Sarah adds the shoes to her cart, creates an account, enters payment information.
Thoughts & Emotions: "Almost there! I hope the checkout process is easy."
Pain Point: Long checkout form, lack of guest checkout option.
Stage: Post-purchase
Touchpoint: Order confirmation email, shipping updates.
Actions: Sarah receives order confirmation, tracks the shipment.
Thoughts & Emotions: "Excited to get my new shoes! I hope they fit well."
Pain Point: Delayed shipping notification, unclear return policy.
Opportunities for Improvement
Based on Sarah's journey, here are some opportunities for the e-commerce website to improve the user experience:
Simplify product filtering and comparison tools on the homepage.
Provide a clear and concise size chart with visual aids.
Offer a guest checkout option for faster purchases.
Send timely shipping updates and clear return policy information.
Integrating User Journey Maps into Design Decisions
By understanding Sarah's journey and pain points, the UX designer can make informed decisions to improve the website. This might involve:
Implementing a clear filter and comparison system on the homepage.
Creating a user-friendly size chart with visual size guides.
Streamlining the checkout process with a guest checkout option.
Including clear shipping updates and return policy information on the website and order confirmation emails.
To kickstart your UX journey mapping process, here's a template for you:
Some Reading Resources for a UX journey mapping 📚


Customer Journey Map User Experience Notebook: User Experience Journey Map Templates by UXlab
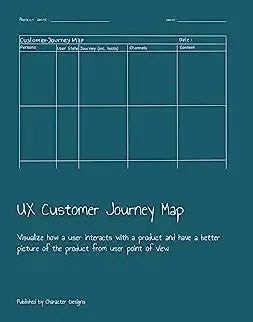
UX Customer Journey Map: Visualize how a user interacts with a product and have a better picture of the product from user point of view by Character Designs
Customer Journey Mapping by Chantel Botha
Customer Journey Maps: 5 Templates by Mirabelle Santos
💡 Tools you can use for User Journey Mapping
UXPressia: a cloud-based customer experience management platform that helps teams to visualize, share, present, and improve their customer journeys.
Miro: A digital whiteboarding tool that houses unlimited user journey templates that you can leverage on.
Smaply: A visual customer experience management software used for creating customer journey maps, personas and stakeholder maps
Custellence: A customer journey mapping tool where users can create and share their customer maps easily with their team to encourage engagement and cross-functional teamwork.
Gliffy: a web-based editor and visualization tool used to create and edit diagrams.
Pro-tip: Filter by the use case: User journey maps
Remember:
Tailor the journey map to your specific project and user base.
Conduct ongoing user research to keep your journey maps up-to-date.
Use journey maps to communicate the user experience to stakeholders.
By incorporating these elements, you'll create a more comprehensive understanding of the user experience and leverage journey maps to create exceptional user-centered designs.
Best regards,
The RB Team


